Pro update: sign in at jmscnc.com. The free download on this page is Community Edition, not the Pro build.
Spin the stock.Read the signal.
Experimental software.
4-axis and 3-axis CAM for DIY CNC. Roughing and finishing from an STL, wrapped and flat engraving, and a material-removal sim.
Free Community Edition, or Pro. Portable Windows ZIP or Linux AppImage. No install, and no expiry.
64-BIT WINDOWS / LINUX · ~270–320 MB

Toolpaths, compiled.
Simultaneous 4-axis rotary
Spiral finishing and radial roughing are free. Raster, axial, and helical finishing are in Pro. Handles, finials, and wrapped forms are the usual work.
What the model has to allow
Orient the part along the configured rotary axis. Hidden undercuts need a different approach. RotatoCAM measures the model and tells you before you generate.
Rough, finish, engrave
Queue rough and finish on one tool into a single program. Engrave text flat, or wrapped around a bar, with a real V-bit.
How a program is built
There is no tool change inside that program. Review the links between operations. A surface-following finish and spring passes are included. Rapids and cutter shape in the backplot come from the exported .nc.
See it before iron does
Backplot, feed check, and material-removal simulation are in both editions. Scrub the estimated timeline and read the exported G-code.
What the checks cover
These checks help you review a job. They do not establish clearance for every holder, fixture, or machine component. Time on the timeline is an estimate.
Controller compatibility, at a glance.
grblHAL · FluidNC
LinuxCNC · Mach3 / Mach4
Centroid Acorn / Oak
Genmitsu
AtomStack C4 Pro · MASSO
HC-204A · Carvera · RosettaCNC
Stock GRBL
3018 / 3040 class
Limits, and where a custom post goes
A controller name alone does not establish compatibility with your machine. Confirm firmware, enabled axes, units, and feed mode on your setup. The posts in the middle column exist, and they do not yet have a machine-cut qualification published here. Prove them out before you trust them with a real job.
Stock GRBL covers flat work and engraving. Do not use the grbl post for rotary motion. A custom post drops in at ~/.rotatocam/posts/. Full table, evidence, and setup notes.
Watch the stock come off.
Run the sim from the exported G-code. Stock left on the model is colored, and the timeline helps you find a suspect move.
What the colors mean in practice
Time is an estimate. Check the simulation and your actual setup separately. The checks do not replace a look at the holder, the fixture, and the machine.

Already have G-code? Meet RotatoVIEW.
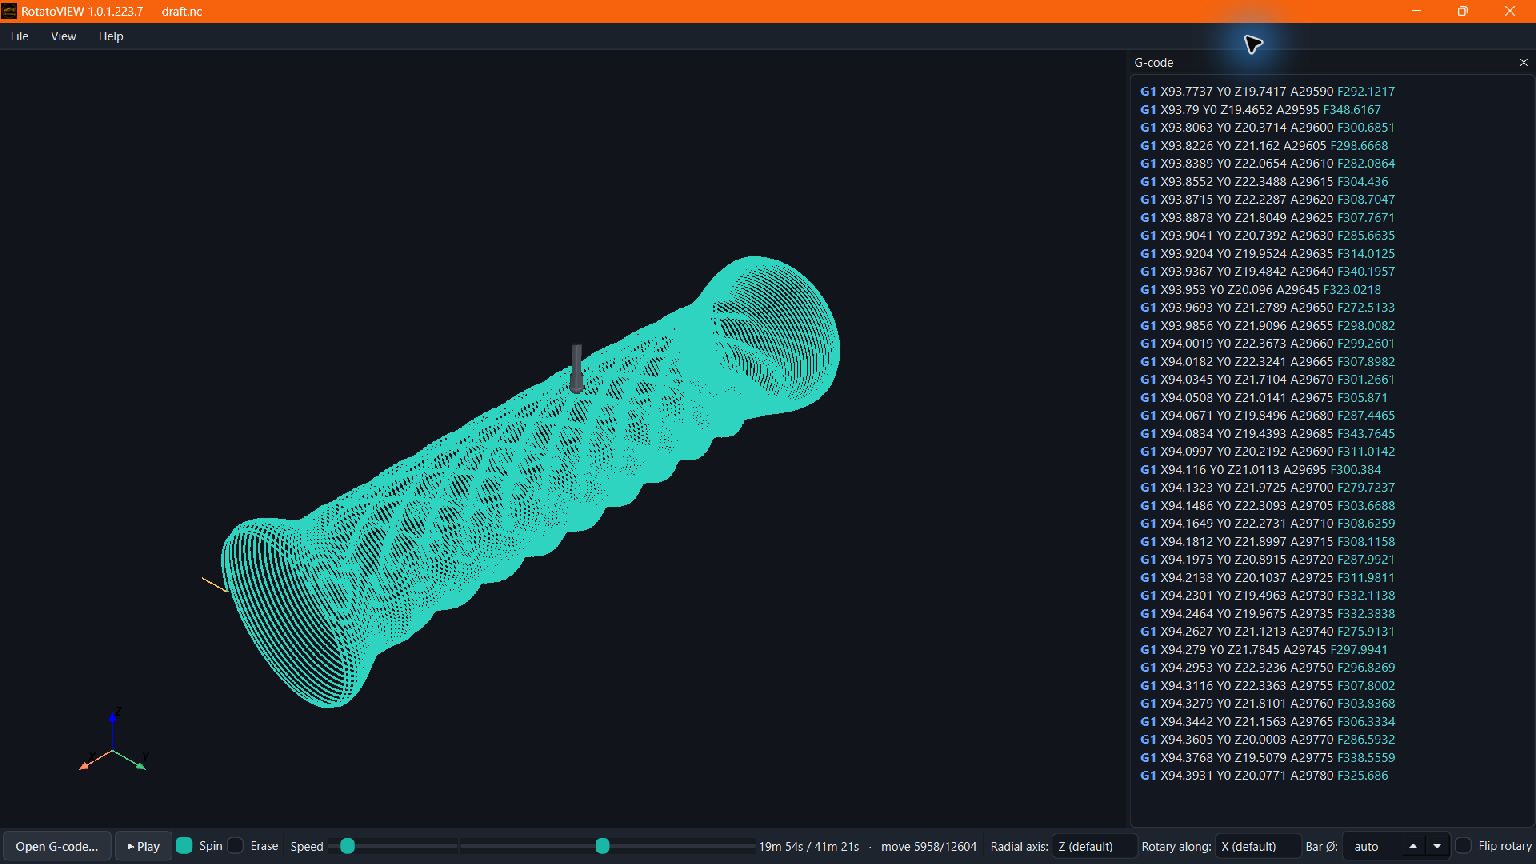
See the path before the chips.
A 4-axis viewer for supported rotary programs. Inspect the wrapped path, follow the source G-code, and scrub the estimated time.
Windows and Linux. $29 on its own, and already included in RotatoCAM Pro.
Explore RotatoVIEWFree to keep. Pro for the deep toolbox.
Community Edition
- Spiral rotary finishing + radial roughing
- Wrapped & flat 2D engraving
- STL · OBJ · PLY · 3MF + DXF/SVG import
- Controller posts with documented limits
- Guided machine + job setup wizards
- Backplot + material-removal sim
- No license, no nag, no expiry
Pro
- Raster + axial/flow finishing · helical roughing
- 3+1 indexed surfacing · pencil cleanup · V-carve
- Conversational (no-CAD) suite · adaptive roughing
- Laser / plasma 2D cutting
- Built-in 4-axis G-code viewer (RotatoVIEW)
Why the free edition is a real tool
CE is not a crippled trial. It stays useful on its own: a suitable rotary part, from model to G-code, with the four core strategies and the full safety and setup workflow. The advanced strategies are where most of the late-night work went, so they live in Pro. If RotatoCAM saves you time, Pro is how you back it. If it does not, the free edition is yours to keep.
What changed in this build.
A two-tool job that each operation could post on its own no longer refuses to post together. Open a row for the measurement, the setting, or the controller note.
A two-tool job posts again
A rough-then-finish queue could be refused outright with a message about not being able to establish clearance for a rapid near the stock, even though each operation generated fine on its own. Nothing was going to hit anything. The pass that lowers a non-turning rapid to the local material radius plus your clearance had already checked the worst radius across the whole move, and the safety check that runs afterwards was judging that same move against the worst radius anywhere on the blank, which on a square billet is the swept half diagonal. The two could never agree, so the better the rougher cleared, the more of the finisher got stopped. A reported 6 mm flat plus 4 mm ball queue produced 473 such moves. It generates now, and it keeps the shorter retracts: on that job 1,692 of 1,897 finisher rapids stay down, about 15 m less vertical rapid travel, roughly two minutes at 7,500 mm/min.
A refused rapid now tells you which one
When clearance cannot be established, the message carries the operation number, the tool, the operation name, the rapid's from and to in X Y Z A, and by how much it misses the stock surface. Three crash logs for the same refusal previously carried no coordinates at all.
Safe Z means the same thing everywhere
The window reads Safe Z as a clearance above the stock surface. The command-line runner read the same saved number as an absolute height, so one job sheet meant two different retracts depending on how you ran it, and because the window saves the number you typed, its own sheets were the ones that disagreed. On a 32 by 32 billet, 8 meant 30.627 in the window and 8 from the command line, which is 14 mm inside the blank. One conversion now, used by both.
The command-line runner clears the blank, not just the part
It was taking the model's largest radius, which on a square billet sits well inside the corners the stock actually sweeps, so a job run outside the window was checked against a datum up to 9.6 mm lower than the same job inside it. Round stock, bar diameter, a billet's swept half diagonal and the wrapped-relief touch-off are all honoured now, as they already were in the window.
A multi-tool queue runs from the command line
It used to refuse with one tool per program. Posting the operations as separate jobs instead is the one thing you cannot recover from, because the finisher would then plan against a fresh blank rather than against what the rougher actually left. The queue now builds together and splits on the way out, one single-tool file per tool in cutting order, the same as the window has always done.
Scallop height greys out when Stepover % is set
It is the sideways spacing of finishing passes, so it can never be zero, and in inch mode its default reads as 0.00079: a number you cannot clear, and with Stepover % doing the job nothing told you it was idle. It greys out now.
Advanced settings is gone
Every setting a strategy uses is on its page all the time. Spring passes stays conditional, because it is a shared row that only some strategies read and showing it elsewhere would be a control that changes nothing.
Your unit choice sticks
The display unit no longer resets between launches. Restoring your saved theme was writing the module default over your saved choice, because the theme restore saves your preferences and ran before the unit was put back.
No more waiting for the chuck to unwind
A rough pass winds the rotary forward as it cuts, and the operation after it used to start by turning all of that back. On a reported two-operation job that was one rapid of 419 turns, minutes of the chuck spinning with Z parked at the retract and nothing else moving, which at the machine looks exactly like a dead Z axis. Whole turns now come out of a rapid before the program is written, in the same direction and leaving the part in the same place. Cutting moves are untouched. On that job, total rotary travel went from 839 turns to 287 and the longest single rotation from 419 turns to 356 degrees, with every cut identical.
Lead-in reaches the indexed strategies
Ramp, arc from side and helix did nothing at all on Indexed Surfacing and 3+1 Adaptive: inside a face the rotary is parked and Z is a real height, but the engine was treating it as a bar radius. They work now. Generation also reports how often a program drops straight down into an enclosed pocket, how deep, and how many of those drops go past the cutter's flute length.
Large-job spindle checks use less memory
Fixed a spindle and holder collision check that could exhaust system memory during toolpath generation, especially on indexed 3+1 jobs. The check keeps its existing sample spacing and collision margin while processing the work in smaller batches. Generation can also be cancelled between batches.
Choose when to check the spindle
Settings, Spindle nose and collision checks now has a separate Check spindle collisions during generation switch. It defaults on. Turning it off keeps your measured dimensions saved and reports that spindle and holder clearance was not checked during generation.
Roughing stopped cutting air
Every radial and helical roughing level used to ride the finished surface across each column a shallower pass had already brought to size: touching, removing nothing, at feed, for the full length of the pass, on every deeper level. Those spans are skipped now. The cutter retracts, rapids across, and drops back in where there is material again. Measured against the material-removal sim on a stepped shaft, air fell from 47% of cutting distance to about 1%, and the program went from 5,764 cutting moves to 3,308. Same part and stock allowance. These are simulated path-distance and move-count results for that example, not a measured machine cycle-time reduction. Results depend on the job.
Reserve a support nub at the chuck
New in Stock setup for rotary jobs: Chuck guard. Give it a length and a core diameter, and cutting inside that zone at the chuck end is clamped to the core radius before the backplot, the sim, and the G-code ever see it. That reserves a holding core in the programmed geometry. Its strength and grip still depend on your material, tooling, and workholding. The sim shows the nub, the warning tells you how many moves it held back, and you part it off after the job.
Rotary mounted along Y
Most rotaries are bolted down along X. Turn yours a quarter turn on the table and the Rotary runs along setting rotates the finished program to match: the part's length comes out on Y, its cross-section on X, and Z and the rotary word stay where they were. The setting applies a rotation rather than an axis swap. Confirm direction, zero, clearance, and the final NC on your setup before cutting.
FluidNC and RosettaCNC
Two named controllers join the list, both driven by customers running them. fluidnc: grbl-flavoured output with G93 rotary feeds, whatever rotary letter your config names, and Z-first rapids built in. RosettaCNC: Fanuc-flavoured RS-274 with G93 rotary feeds, and the post pins RTCP off (G49) because RotatoCAM output is already fully resolved machine motion. Check the controller software, feed mode, offsets, and clearance on your setup. Setup notes.
HolzProfi CNC6090 / HC-204A
A post for the HC-204A handheld control, whose rotary runs along Y. Written from the controller manual rather than inferred, which matters here because its accepted command set is unusually small. It does do simultaneous four-axis: the manual has a rotary speed parameter that applies "in 4-axis linkage". Setup notes.
AtomStack C4 Pro
Its rotary is treated as a real fourth axis in plain degrees, not a substituted Y and not a circumference conversion. Absolute angles past a full turn are kept so a continuous spiral keeps counting up instead of resetting every revolution. Built from a live-machine handoff by a C4 Pro owner who read his own controller.
Tapered cutters, planned as the shape they are
Pick taper, give it an included angle and a tip diameter (or a corner radius for a tapered ball nose), and a fine-tipped tapered bit plans as the shape it is. Scallop height is a geometric planning target for the selected cutter model. Inspect the simulated deviation. The actual finish also depends on tooling, material, and the machine.
Operations chain
Queue rough then finish and the second operation begins from what the first one really took off, so the finish cuts the leftover instead of skimming the whole part again. Use one tool per program and review every operation transition. Stock-based retract planning still needs a clearance check against your workholding and machine. Older custom posts may restrict operation chaining.
A French option, where it matters
Settings, Language translates the safety gate and the getting-started guide, the two places where a misunderstanding is expensive, and Windows' own file dialogs follow along. Menus and parameter names stay in English on purpose.
Custom posts, and the rest of the controller list
Drop a post file into ~/.rotatocam/posts/ to add your own controller. No rebuild. See the controller table for operation scope and known limits. Genmitsu simultaneous rotary, AtomStack C4 Pro, HC-204A, Makera Carvera, MASSO, and RosettaCNC still want a prove-out on the exact machine.
RotatoVIEW
Need to look at 4-axis G-code without generating it? The standalone viewer loads supported rotary .nc files, draws the wrapped toolpath, and scrubs by estimated time. Windows and Linux share one RotatoVIEW license. The key and the downloads arrive at checkout. Pro already includes it.
Did it earn its keep?
Maybe RotatoCAM saved you a CAM subscription. Maybe it cut a wrapped nameplate, a clean 4-axis finish, or the columns for that miniature gladiator stadium. CE stays free either way. If it made the machine do something worth doing, a coffee funds the next fix.
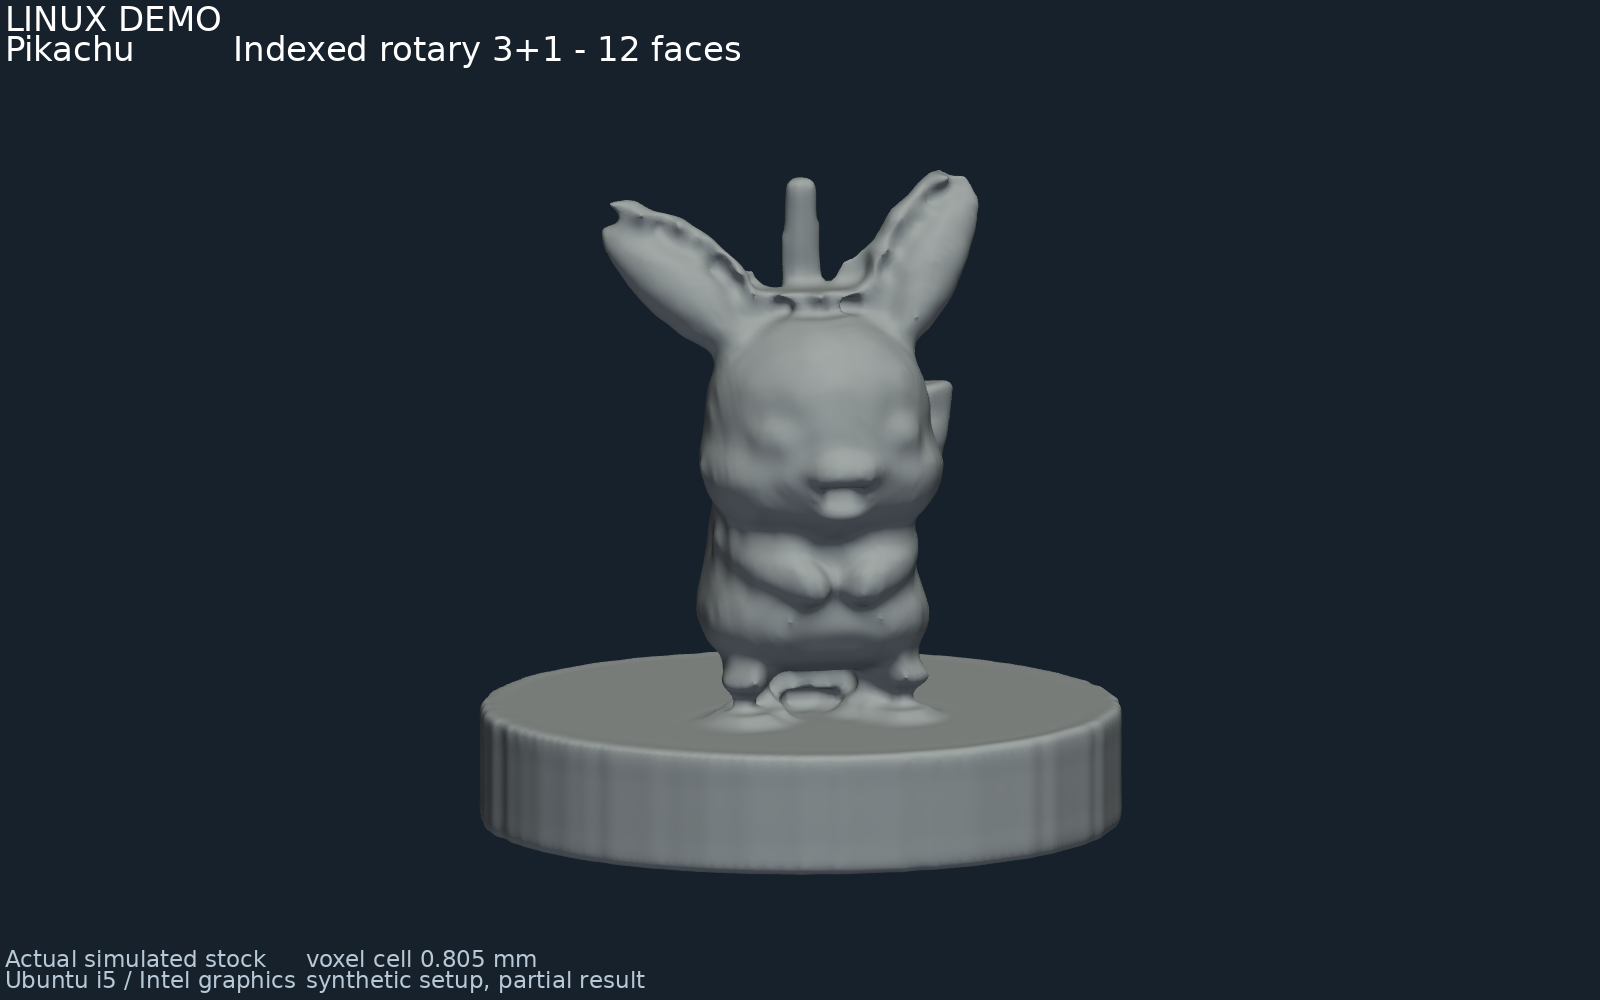
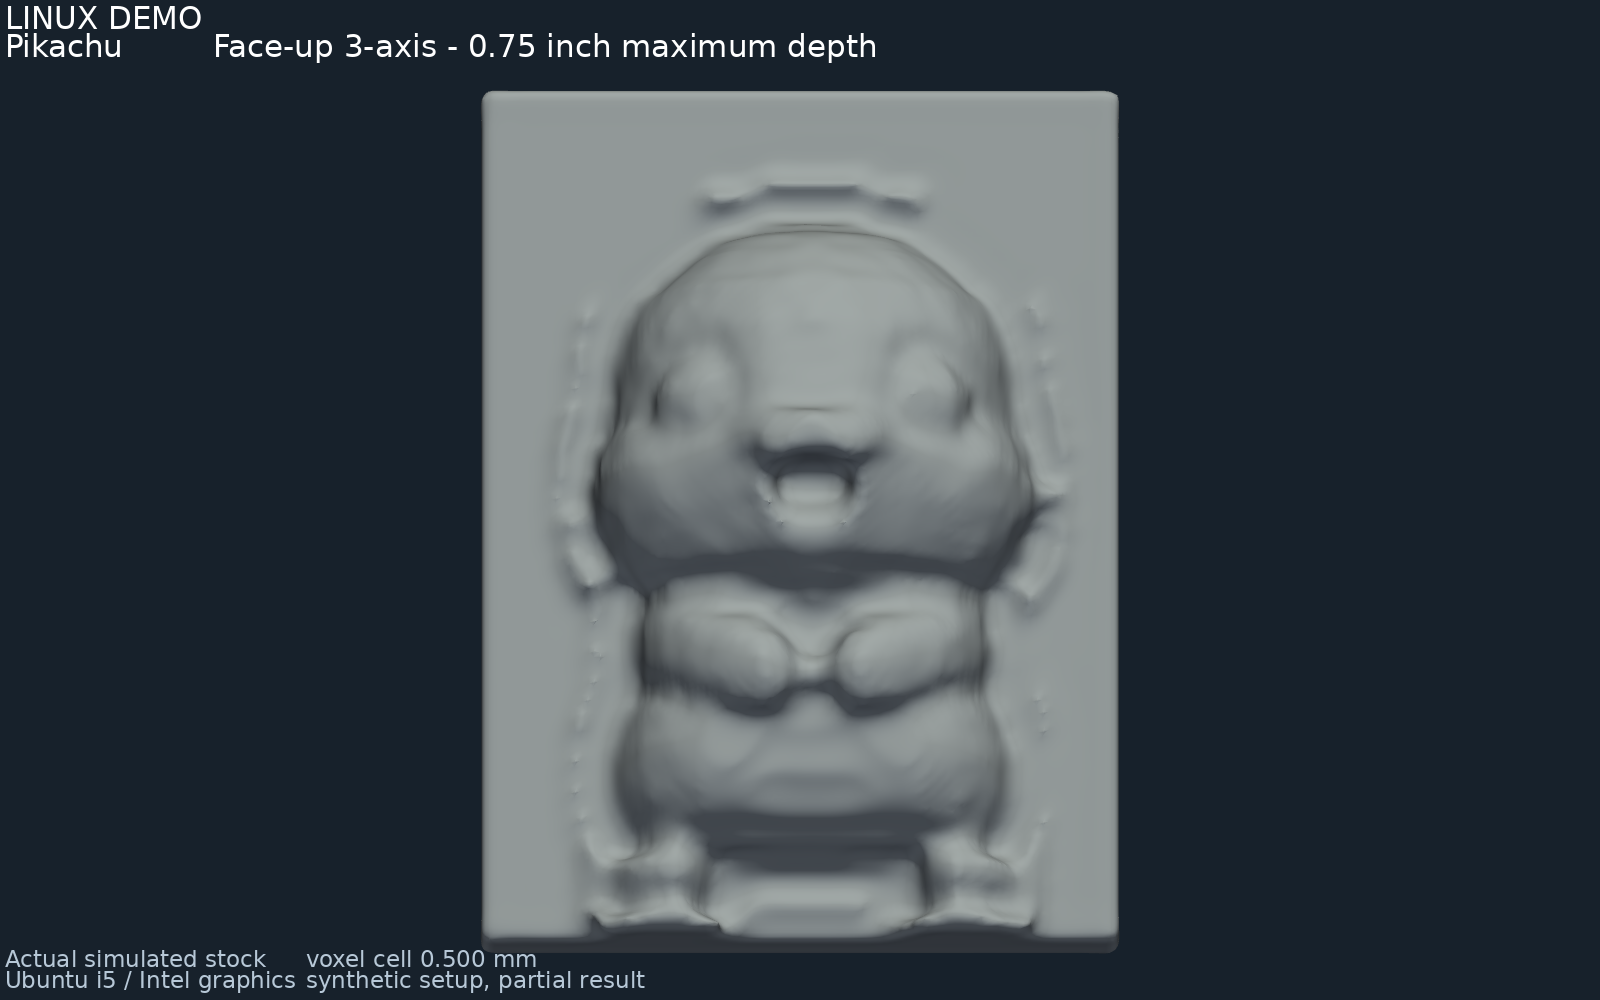
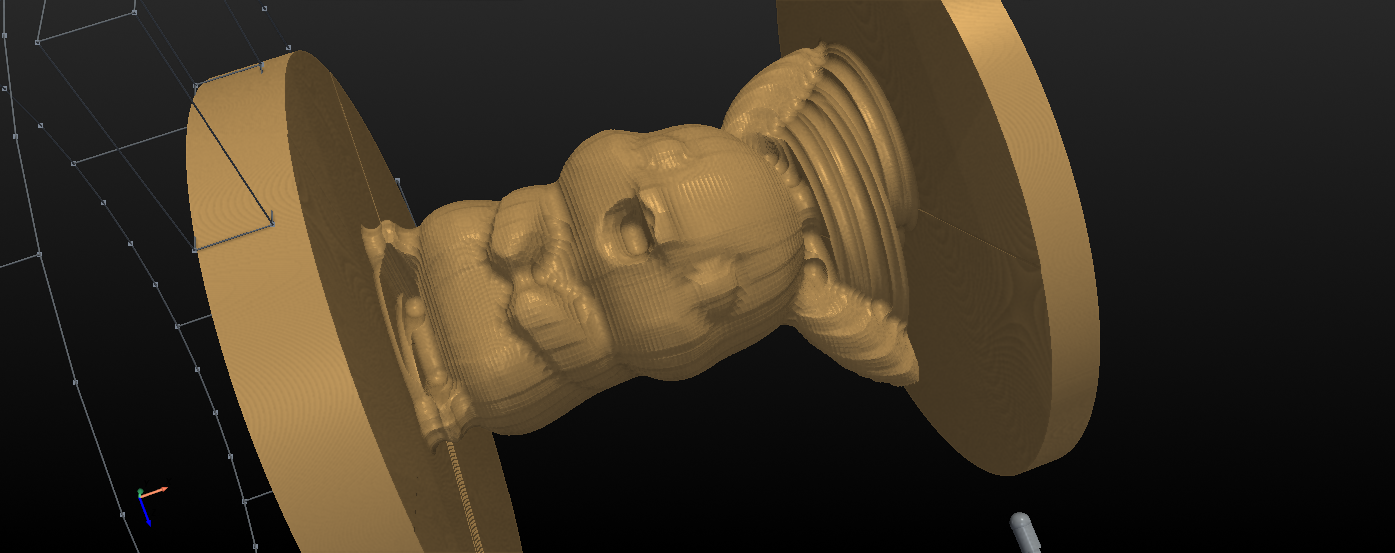
Pikachu, cut on Linux.
Recorded on Ubuntu with an i5 and Intel graphics. Indexed rotary, and a face-up 3-axis cut stopped at 0.75 inch.
About these pictures
These are captures and recordings from the app. The Pikachu jobs are partial simulations: 12 clockings for the indexed rotary, and a face-up cut limited to 0.75 inch (19.05 mm) below the block surface. Voxel size is 0.805 mm on the rotary result and 0.500 mm on the 3-axis result. Playback in the clips is accelerated, and earlier passes were simulated before the excerpt. Coarse simulation surfaces are not a tolerance check, and none of this is a physical machining test.
Columns, cams and chess.
Fresh captures from RotatoCAM on Ubuntu. Click a picture for the full window.
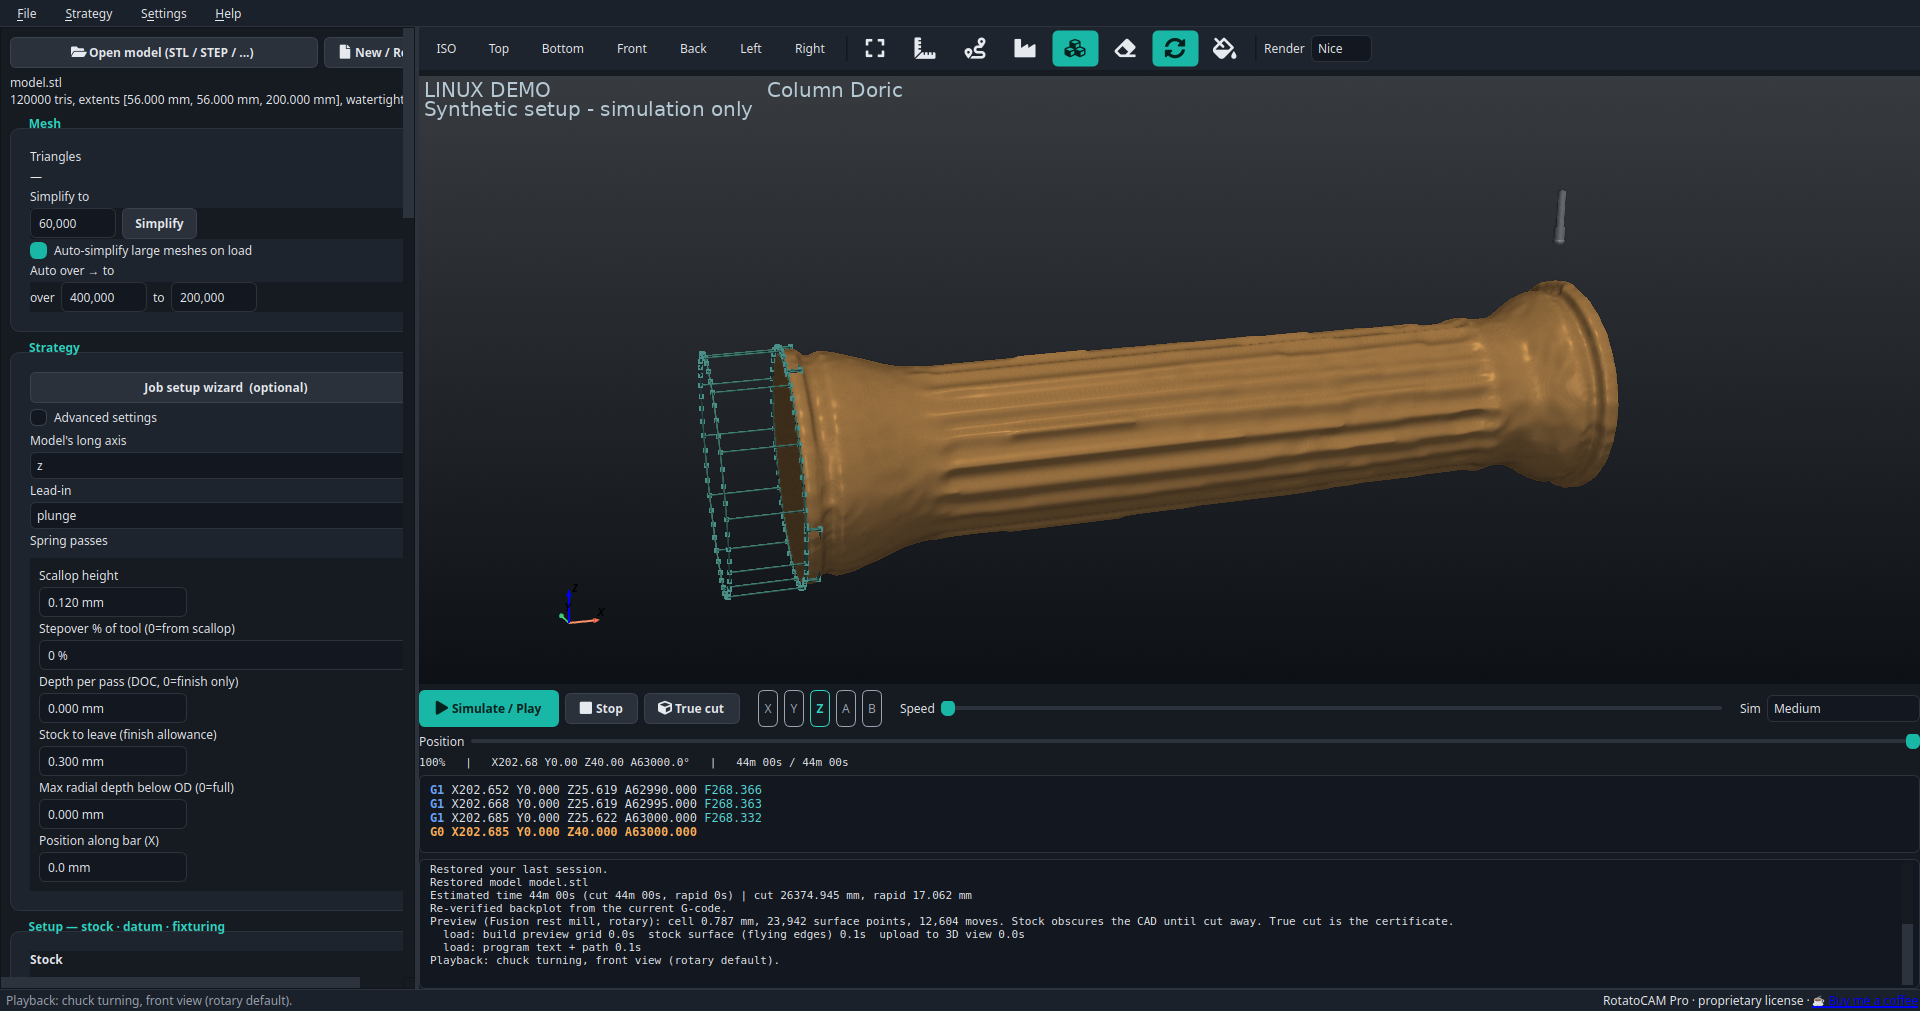
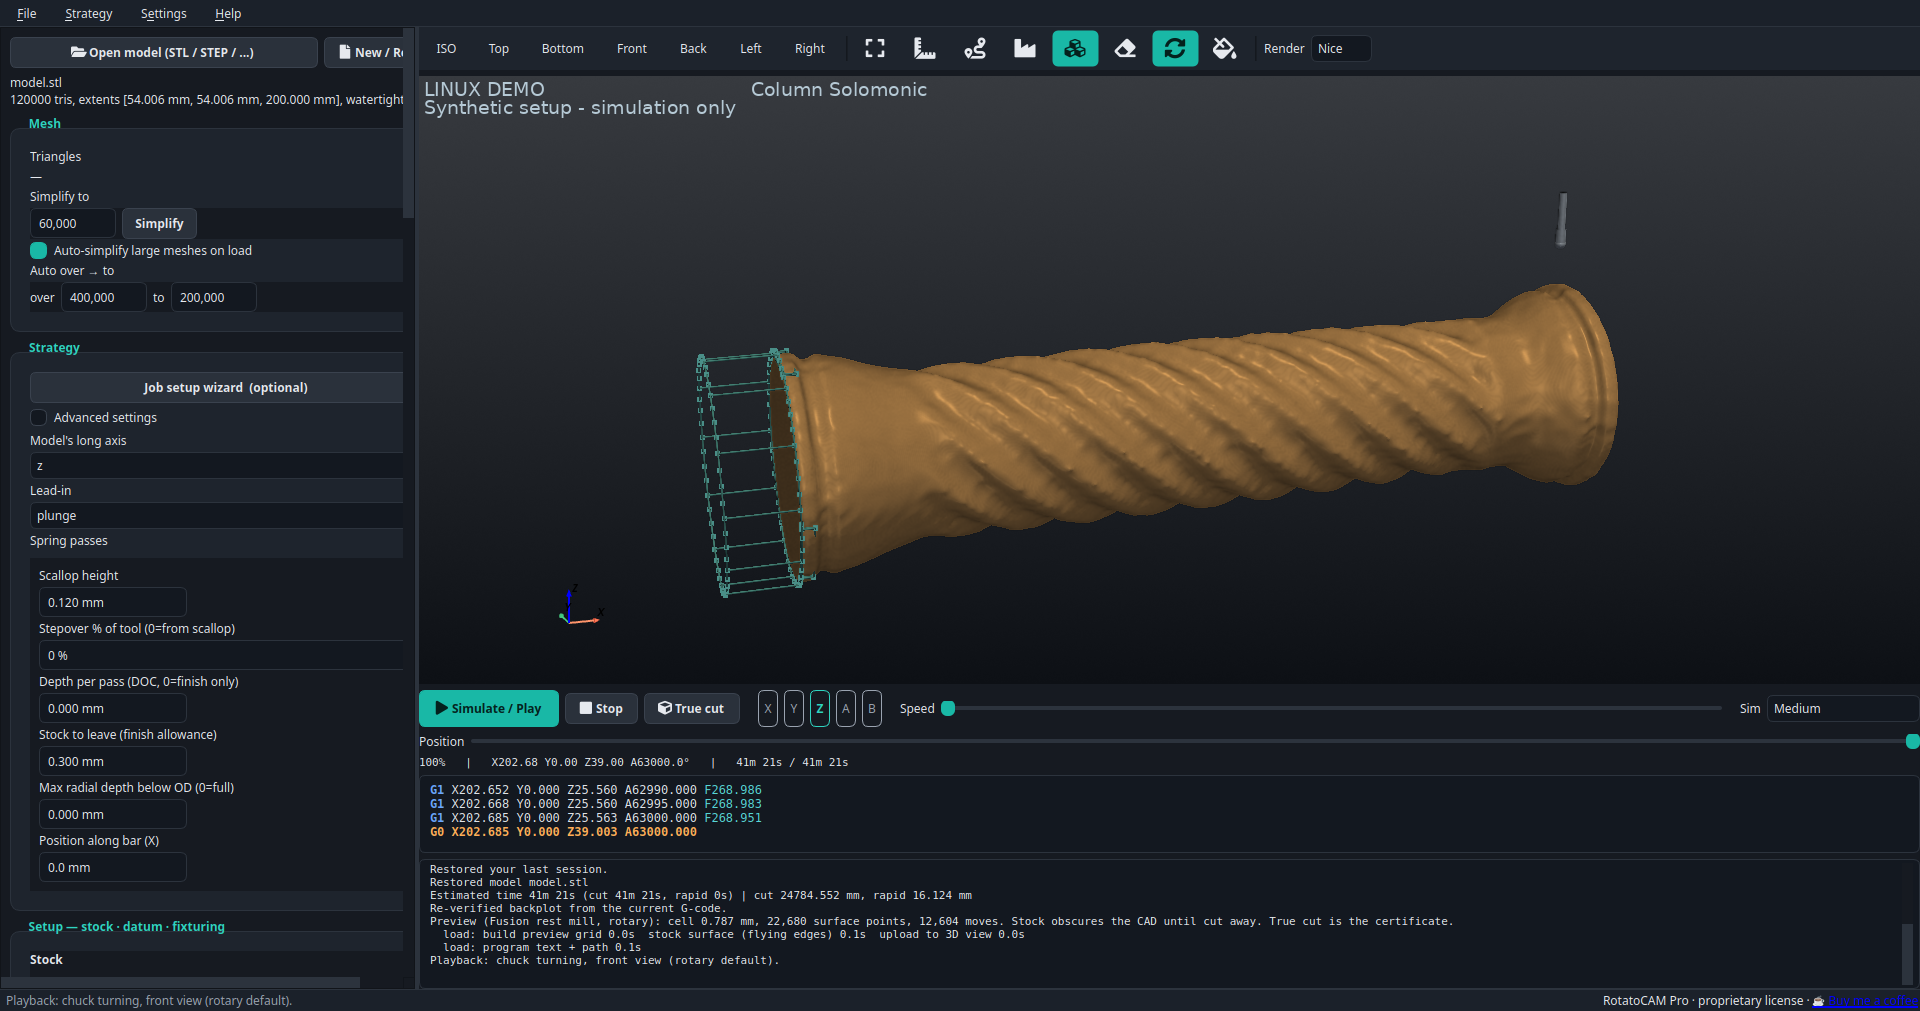
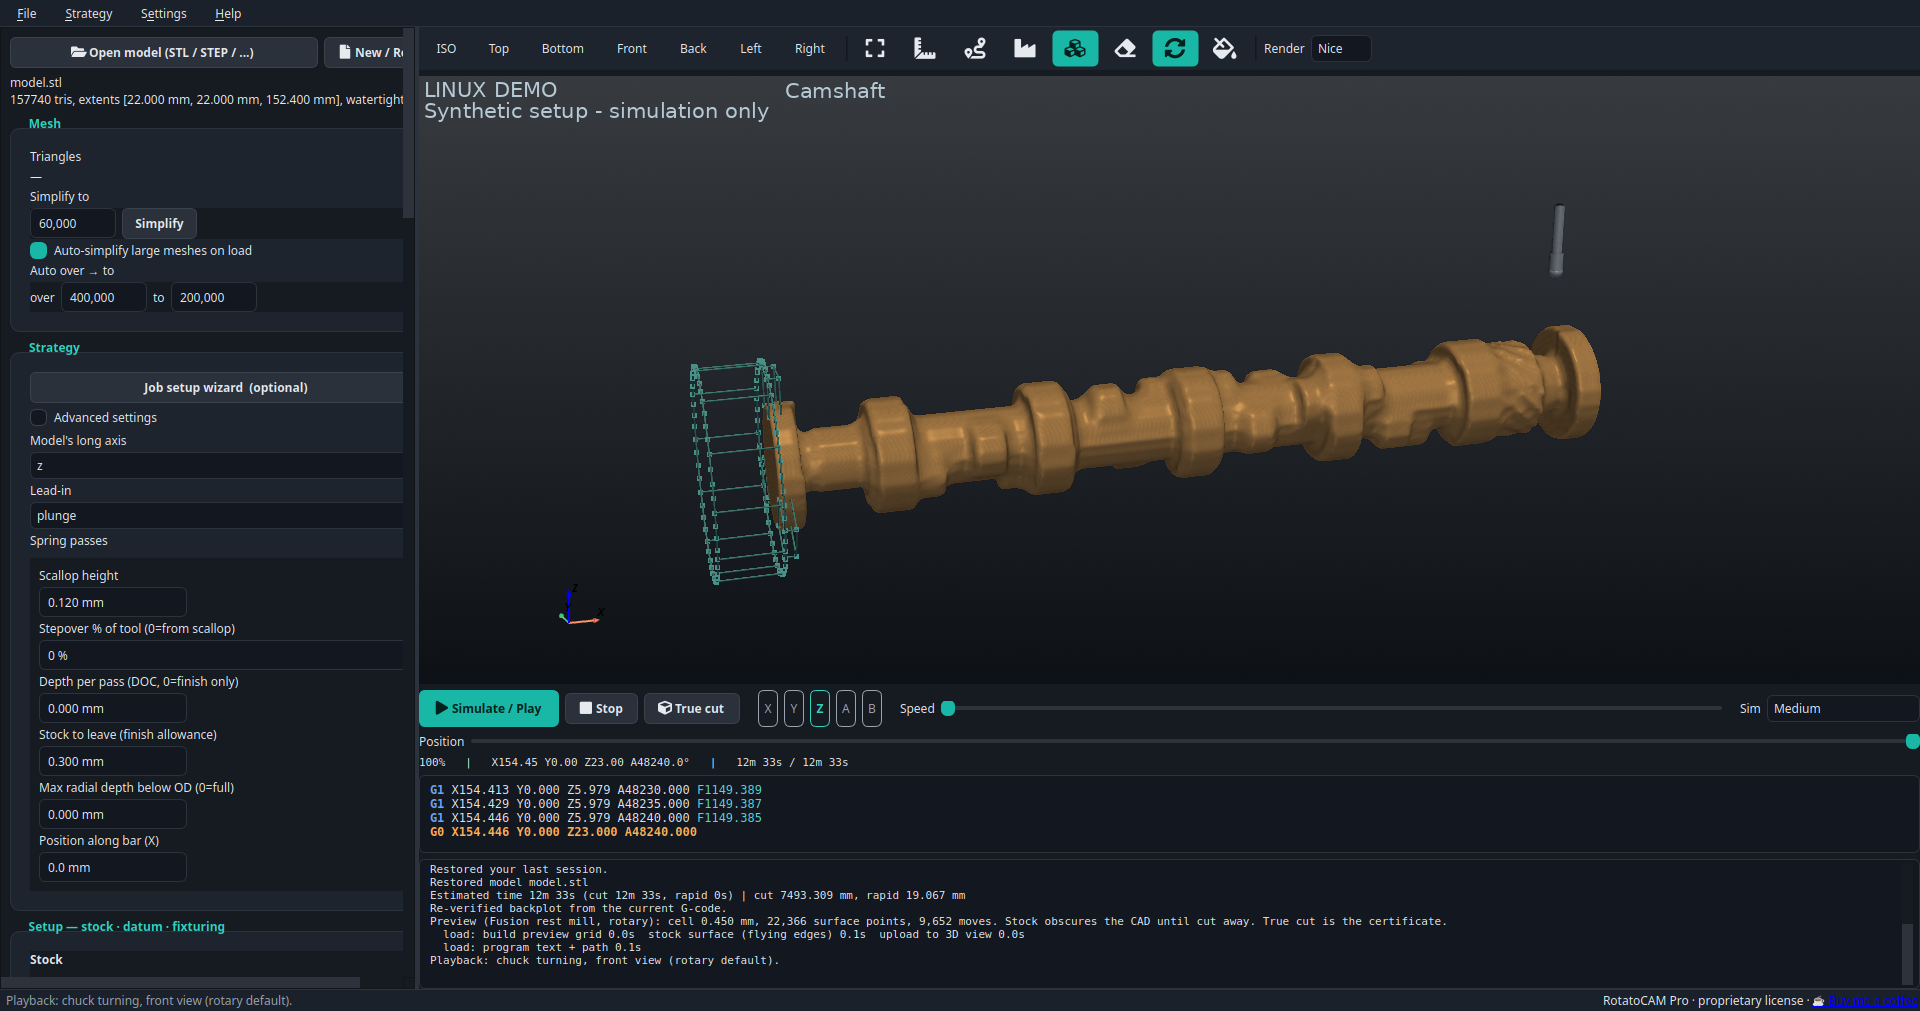
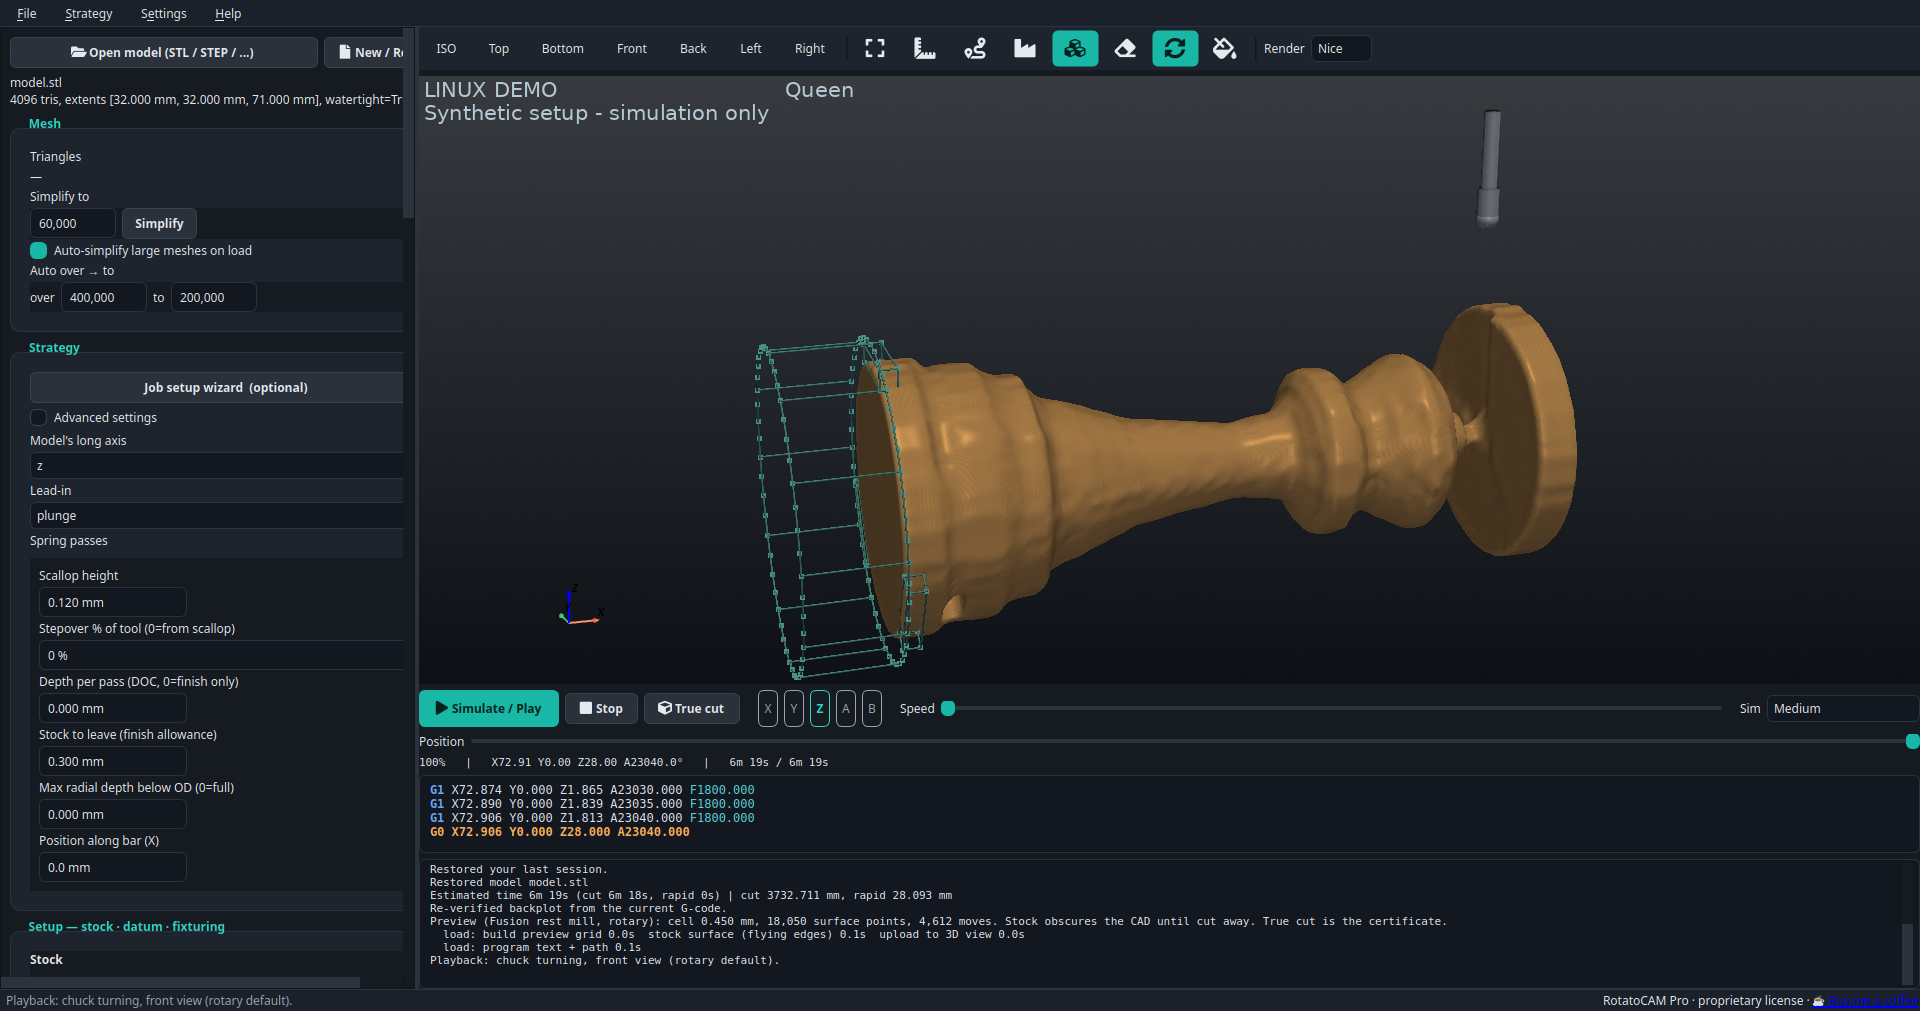
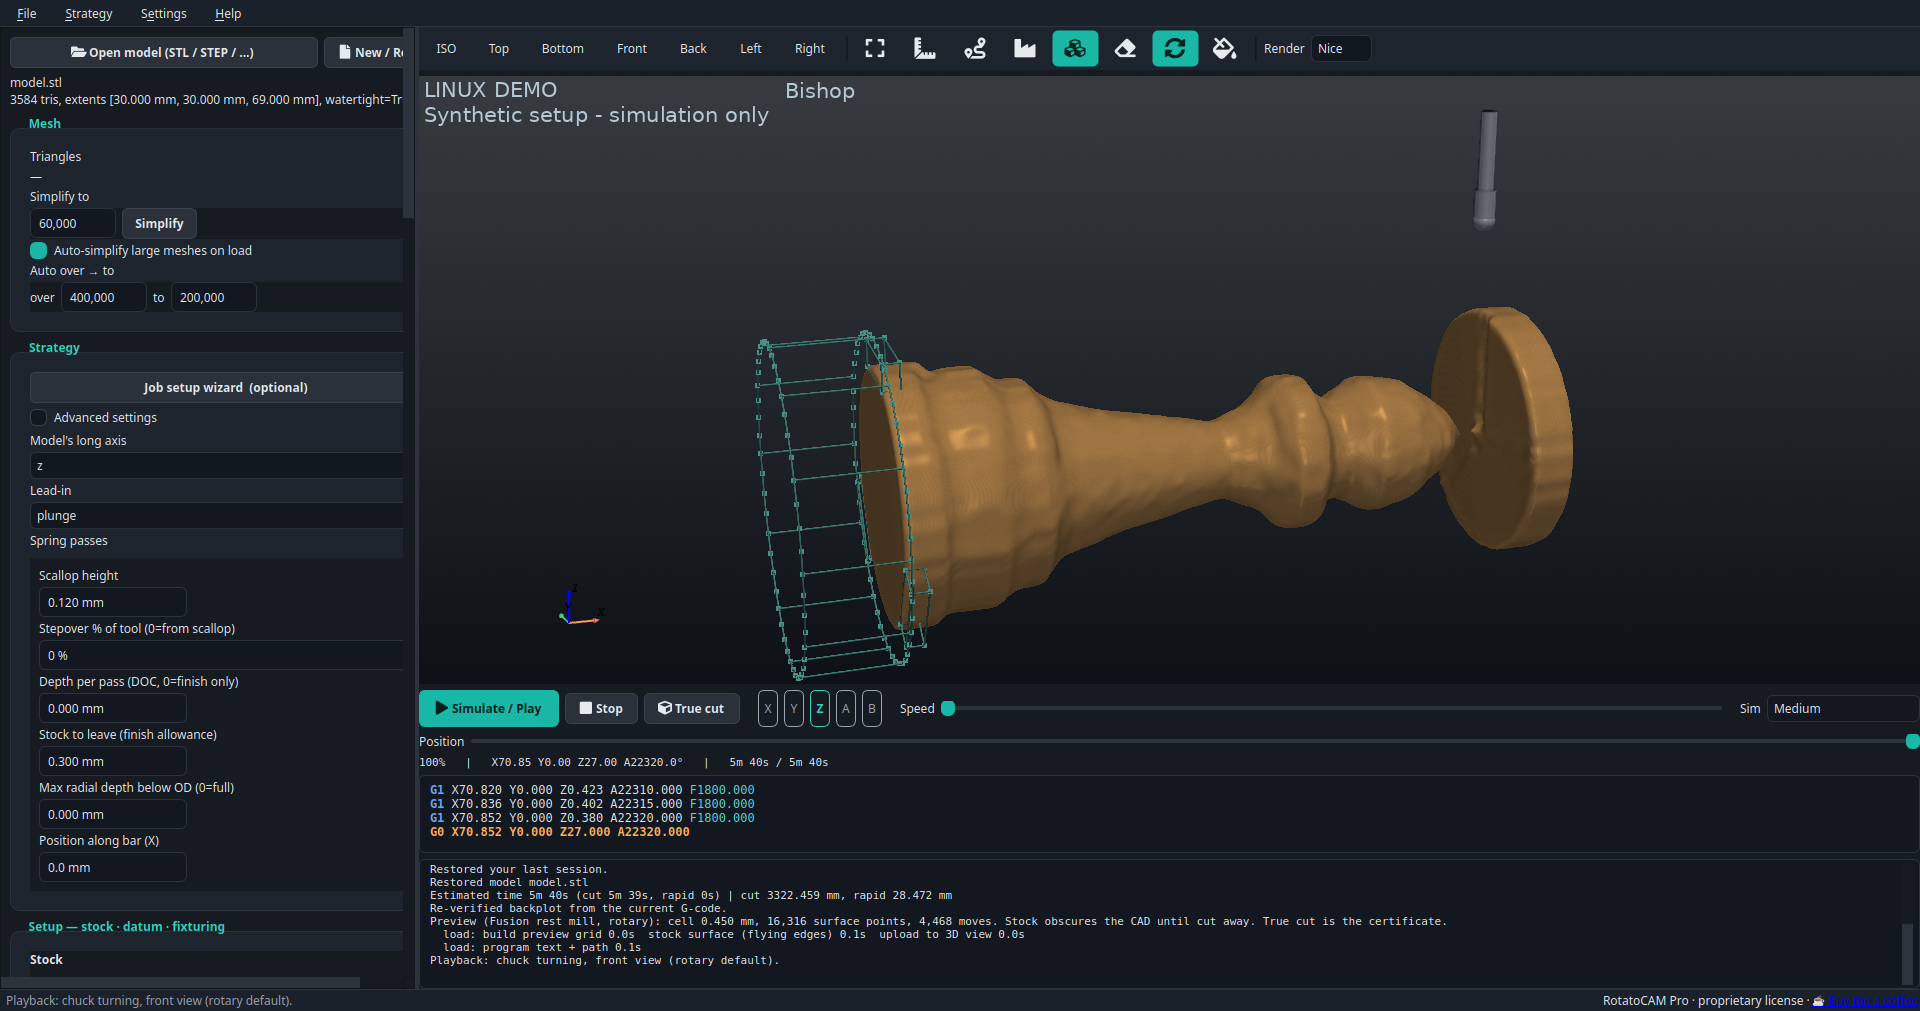
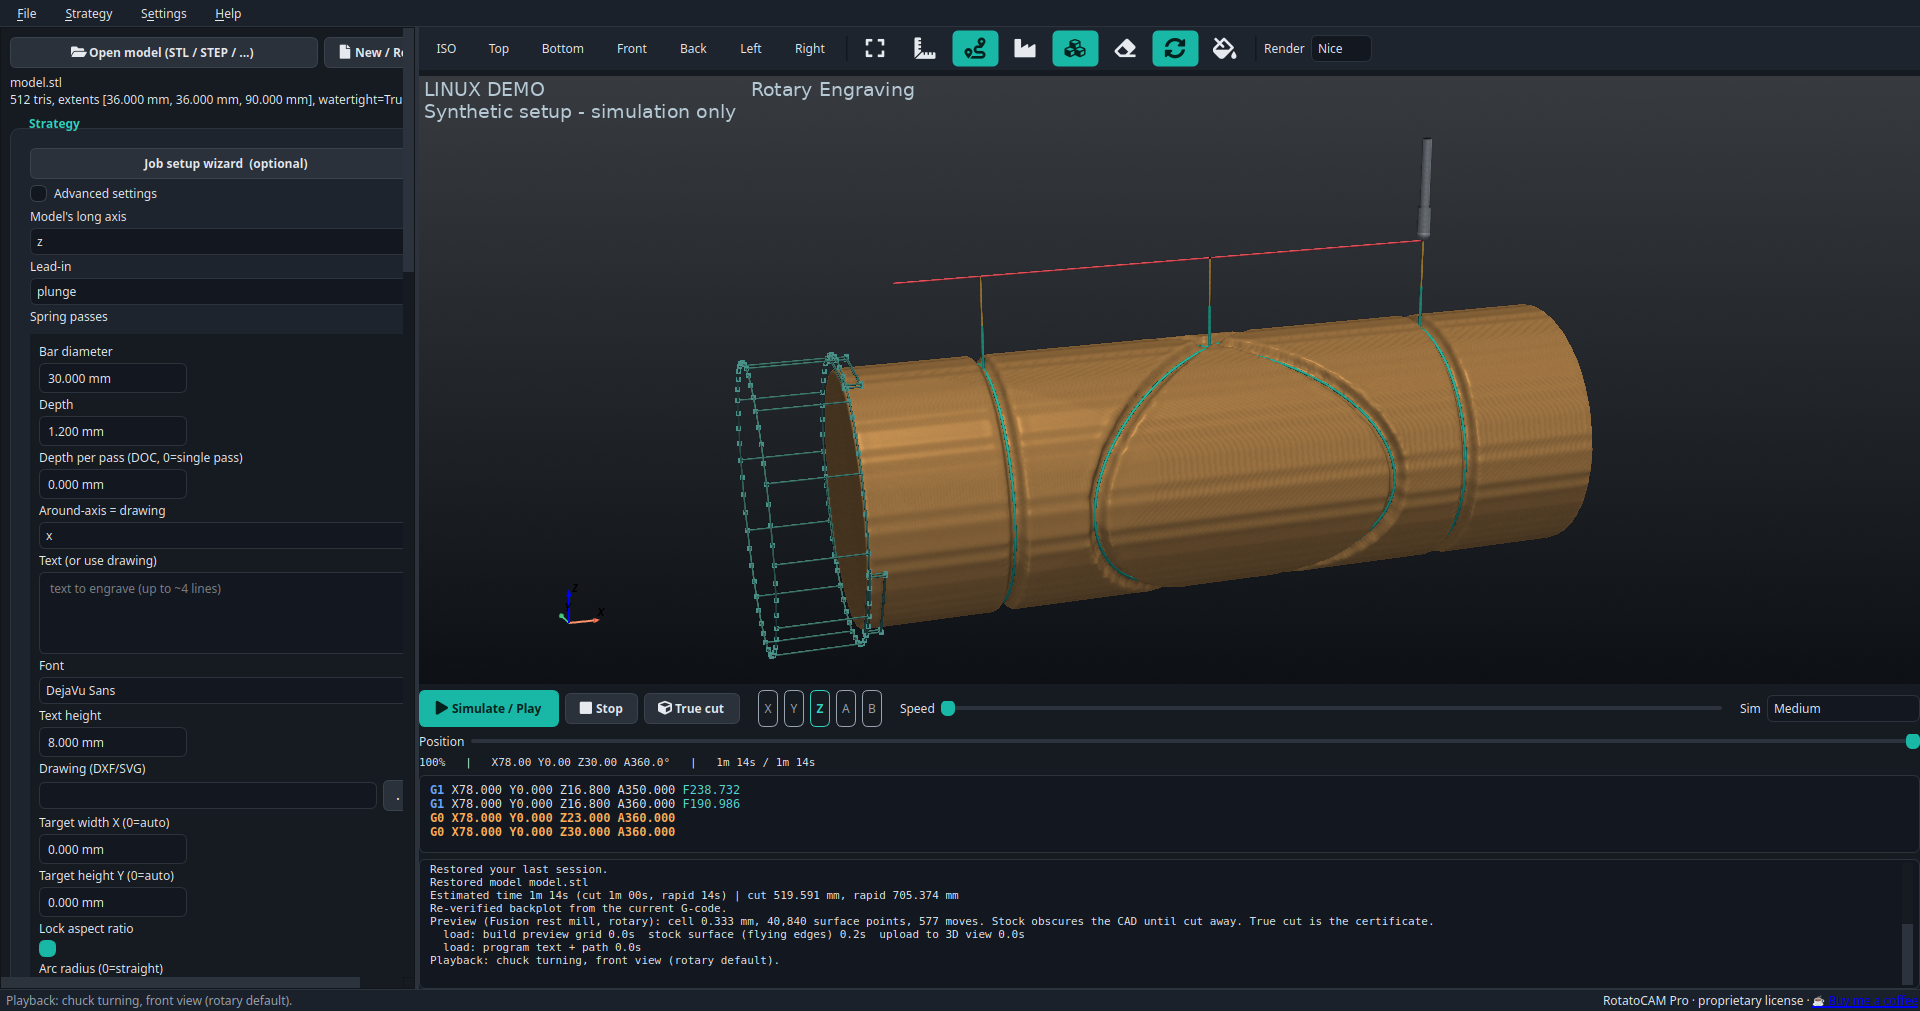
Pick your look. Read the cut.
Amber CRT, Light, Dark, and Green. Frames from the real app: cutter shape and rapids from the exported .nc.
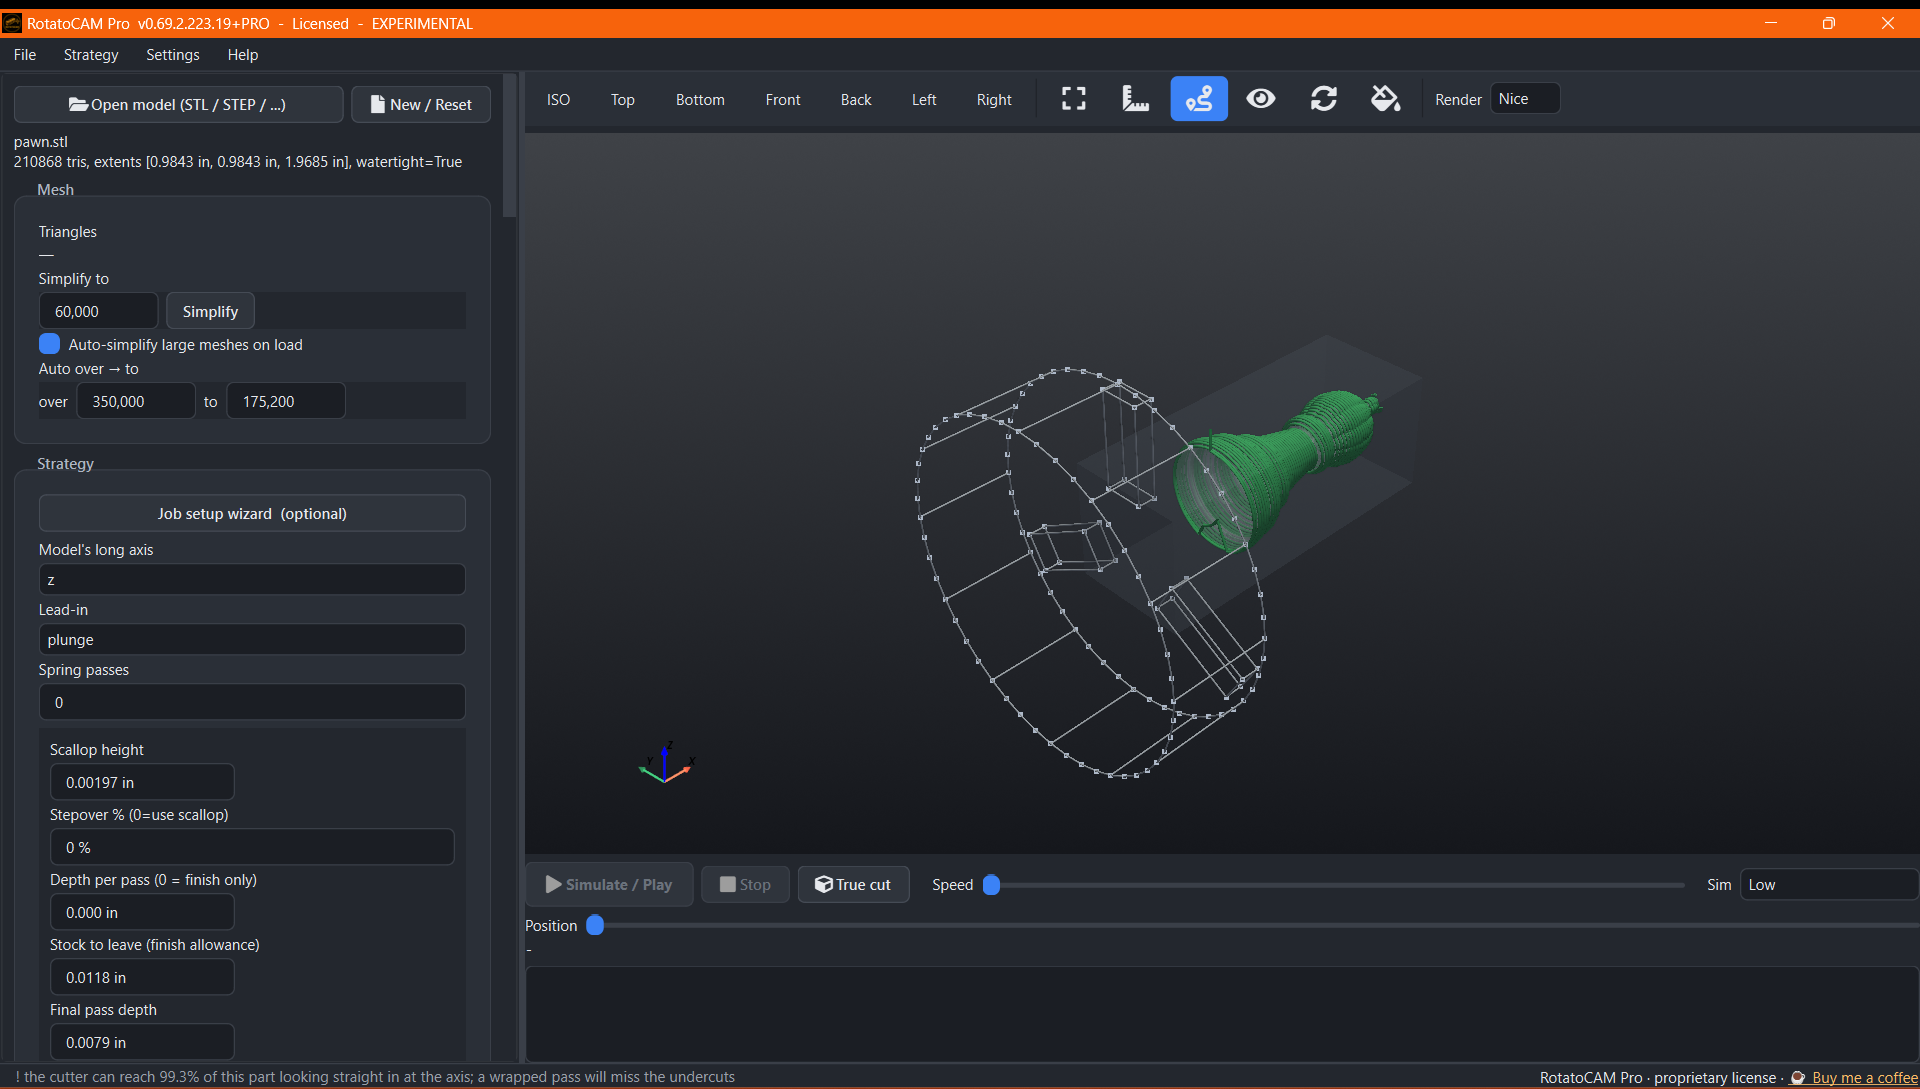
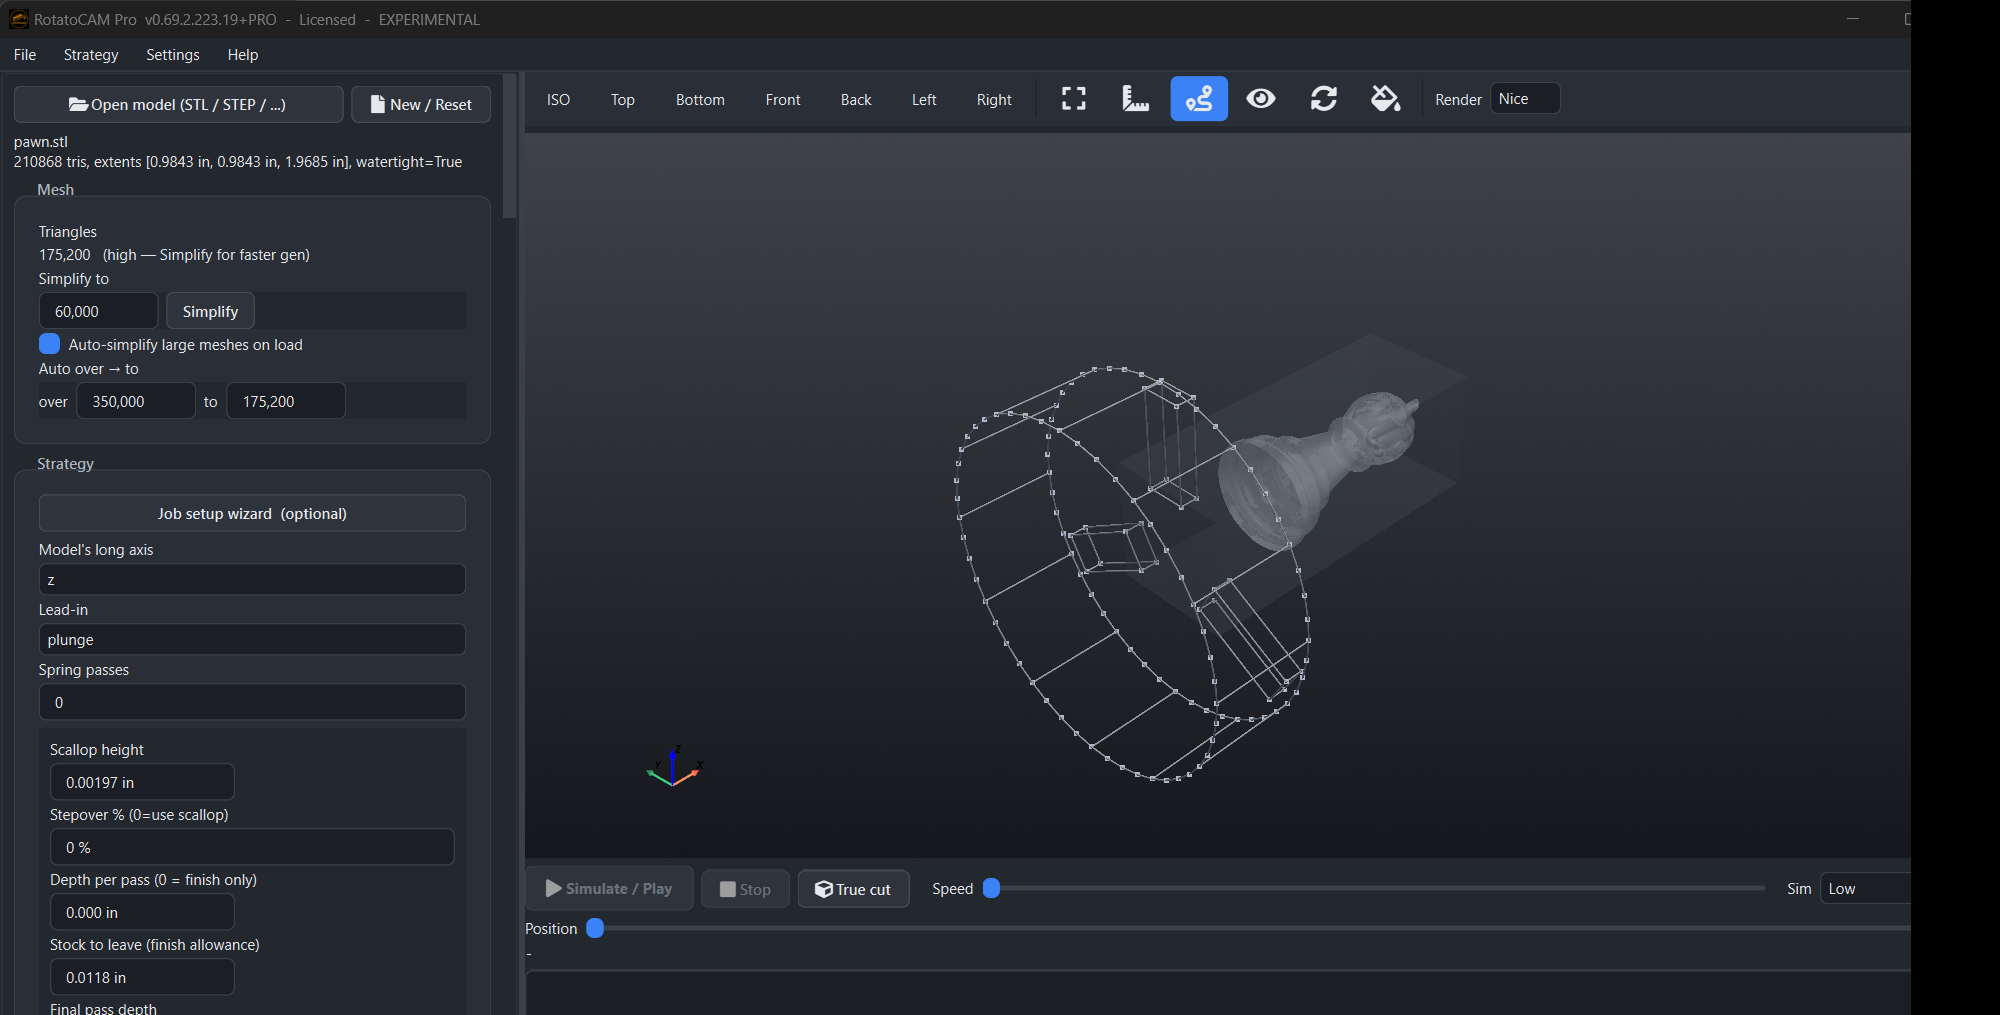


STL in. G-code out. Watch it cut.
A chess pawn, from model to simultaneous 4-axis G-code to a spinning material-removal sim. Every frame is from the app.
Send me what you made.
A photo of a real part is the picture this page does not have yet. Machine, material, tool, strategy, and the RotatoCAM version are the useful details.
+ their name and machine
phone photo, chips and all
not shown above
removal sim running
Four things the posted G-code is doing
The F word changes every line. Posts using G93 inverse-time express a target block duration: 1/F minutes. That lets the planner coordinate rotary and linear motion toward a surface-feed target. Some controllers want a different feed convention. Axis limits can lengthen the actual move.
Degrees are not millimetres. Rotary timing under G94 depends on the controller. Reusing a G93 inverse-time F value as a G94 feed can produce a very different duration. Match the post to the controller you actually have.
A720 is not a typo. A continuous spiral may count through A450, A720, and A1080. The controller and the rotary have to accept those turns. Resetting the angle on your own can make the axis reverse. Confirm wrap behavior and travel limits first.
One radius per ray. A wrapped pass stores a single radius for every ray out from the rotary axis, so it can only describe shapes that are star-shaped about that axis. RotatoCAM measures the model and tells you the percentage before you generate. A smaller tool will not recover a shape the wrap cannot describe.
From STL to G-code.
Six stages for a first job. The checks depend on the strategy and the controller.
Load
File, Open model, for an STL or STEP. Or type your text, or load a DXF or SVG, for engraving.
Pick a strategy
Choose one from the Strategy menu. The four Community Edition strategies are below.
Tool and stock
Pick a ball mill, a flat end mill, or a V-bit, and set its diameter. Stock can be Auto, a round bar, or a box billet.
Machine setup
Pick the controller, set the surface feed, and set Safe Z. Then check the limits against the machine in front of you.
Generate and simulate
Generate toolpath for the backplot. Simulate or Play to watch the cut and look for gouges.
Export
Export G-code writes the .nc or .ngc. Read it, then follow your machine's prove-out before you cut.
Open a job that is already filled in. Help, Open example projects. Then File, Run job file, and pick a .yaml. Model, tool, stock, and strategy are set. Generate, simulate, export.
Two wizards, if you would rather not hunt through panels
The machine setup wizard (Settings, Machine setup wizard, and offered the first time you run the app) records the controller and the machine limits. Check the values, and open it again when the setup changes. The job setup wizard (Strategy, Job setup wizard) walks one job from what you are making through the tool, feeds, clearance, and work zero, and shows a summary before it writes anything. Both write the same panels as doing it by hand. Nothing is hidden afterwards, and nothing is locked.
What each one is for
4-axis finish (spiral)
A helical finishing pass over a rotary part from an STL. Ball end mill, round stock. Lower the scallop height for a finer finish.
4-axis rough (radial)
Clears a round bar in radial layers before the finish. Set depth per pass and stock to leave. Tick Finish pass to chase it with a spiral.
2D engrave (flat)
Text or a DXF/SVG drawing into flat stock. Type the text or load the drawing, choose a V-bit, set the depth, generate.
Wrap engrave (rotary)
Text or art wrapped around a cylinder. Set the bar diameter and the depth, then generate.
Prove it out. Then cut.
RotatoCAM writes a G-code file. It does not run the machine, and it does not press Go.
On the PC first
Open a model, or the bundled examples. Pick a tool and a strategy, then Generate. Read the backplot, run the feed check, and run the sim. Check rapids against feeds, depths, and units (G21 mm / G20 inch).
On the machine, with no material
Confirm the post, the work offsets, the tool length, and the rotary direction. Follow the machine maker's prove-out with the tool and every moving body clear. Raising Z does not by itself clear a rotary. Stop and fix anything that does not match the backplot.
First real cut
Use a simple job you already reviewed, and tooling the machine is happy with. Start with conservative feeds from the tool and machine guidance. Check the workholding, measure the result, and sort out any difference before a harder job.
4-axis, a few extra checks
In Machine setup, set the max swing radius (spindle-to-table clearance). A 4-axis job whose part radius exceeds it is blocked on purpose. Also check the post's feed convention, and the rotary's direction, turns, limits, and clearance.
What a passed check does not cover
A passed feed check or swing-radius check does not establish clearance for the whole assembly. Look at the holder, the fixture, and anything else that moves.
Every job
- Dimensions checked (measure thrice, cut once)
- Backplot, feed check, and sim look right
- Correct controller and units (mm or inch)
- Tool length and work offset set, stock clamped
- Air-cut done, and the motion matched the backplot
- E-stop in reach, eyes and hands protected
Warranty
Hobby software, provided as-is, with no warranty. You are responsible for inspecting every program and for operating the machine. CNC machines can hurt you. Never run a generated program you have not checked on your own setup, with your own tools.
Found a bug? Tell me.
Crashes, wrong G-code, and anything unsafe get looked at first. Say what you did, what happened, CE or Pro, and the controller. Attach the STL or job and the generated .nc if you can. In the app: Help, Report a bug. Or talk it through on Discord.
Choose your platform.
Experimental software.
Python and the application libraries are in the download. Unzip the Windows build, or mark the Linux AppImage executable, and run it.
Community Edition
Free. The complete free toolbox. It runs with no license.
Pro, $99
The full strategy set: indexed 3+1, pencil, conversational, adaptive, V-carve, laser and plasma, and more. Pay once for this version. A later major version is a separate $99. Windows and Linux downloads are in your account after checkout.
The same Pro license covers Windows and Linux, inside your activation limit. Get either build from your account. Standalone RotatoVIEW has its own license, and its own Windows and Linux builds. This Linux build targets Ubuntu 24.04+ or Debian 13. Debian 12 is not supported.
SmartScreen, FUSE, and the first launch
Windows may say "Windows protected your PC". Choose More info, then Run anyway. On Linux, mark the AppImage executable and run it. If FUSE is missing, run it with --appimage-extract-and-run.
System requirements
Minimum: 64-bit Windows 10/11 or Linux x86_64 (Ubuntu 24.04+ / Debian 13, glibc 2.39+) · 4-core CPU · 8 GB RAM · GPU with OpenGL 3.2+ (integrated is fine) · ~2 GB disk.
Recommended: 6–8 core CPU · 16 GB RAM · SSD · a basic discrete GPU (for example a GTX 1650), for big models, fine sim detail, and the Max render look.
RotatoCAM is CPU-bound, so clock speed matters most. The GPU mainly drives the 3D view.
Before you press Go
Inspect the backplot, simulate the program, and air-cut it on your machine. RotatoCAM cannot see the setup.